http://health.msn.com/nutrition/slideshow.aspx?cp-documentid=100204508&imageindex=1
MSN, 12 food additives to avoid

Saturday, February 28, 2009
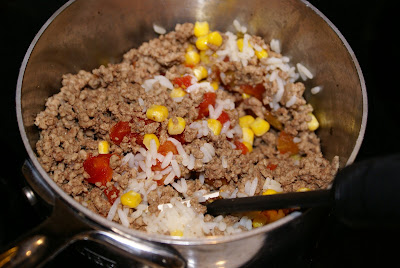
beef and potato burritos
http://www.pbs.org/everydayfood/recipes/beef_and_potato_burrito.html
use acceptable oil or butter
use always acceptable sour cream with just cream and salt
use acceptable tortillas or make your own (gf if needed)
These were sooooooooo good!
use acceptable oil or butter
use always acceptable sour cream with just cream and salt
use acceptable tortillas or make your own (gf if needed)
These were sooooooooo good!
Tuesday, February 24, 2009
snack sized...
Just a note here, I can't remember if I've posted about this or not. I love snack sized containers! I like to get them from the grocery store, dollar store, or ichiban kan online.
My kids see a snack and they go crazy eating the whole thing. So, right when we get it home we put it in snack sized containers. We also do this with yogurt, homemade jello, and anything else that needs portion control.
My kids see a snack and they go crazy eating the whole thing. So, right when we get it home we put it in snack sized containers. We also do this with yogurt, homemade jello, and anything else that needs portion control.
Lentil soup and dumplings
| Here's a recipe from hillbilly housewife. Usually we like our lentil soup with homemade bread and butter but we've tried these dumplings and they're great. You can use the dumplings in any soup. I think they're great with veggie. Soup
Dumplings
Begin by making the soup. Rinse the lentils under running water. Then place them in a large pot and cover them with 2-quarts of water. Bring the mixture to a boil and allow it to simmer over medium heat for about 20 minutes. The lentils will be almost tender. Add the vegetables, bouillon, garlic and black pepper. Stir gently and allow the mixture to simmer for 20 minutes more. The vegetables and lentils will both be tender. Taste and add salt if you think it needs it. Here's another great bean, lentil and dry pea recipe you may want to try ... Chickpea Tacos. My family will just gobble those up. |
Menu #2
Sorry, I forgot that I was going to post my menus...here's my #2 menu
Sunday:
start lentils in crock pot, soak red beans for tomorrow, thaw roast for tomorrow night, start bread if you're soaking it.
Breakfast:
Waffles, eggs, approved bacon, frozen 100% orange juice
Lunch:
tortilla pizzas (use approved tortillas or homemade, tomato sauce, whole milk mozzerella cheese, and veggies
Dinner:
Crock pot lentil soup, bread and butter
Monday
Make bread for tonight, cook red beans and rice for lunch, start roast in crockpot for dinner
Breakfast:
Impossible Coconut Pie
Lunch:
Red beans and rice
Dinner:
roast, veggies, bread and butter
Tuesday
Remember to start potatoes for lunch, make extra for Wed and Thurs
Breakfast:
Hootenannies and real maple syrup, honey, fruit,
Lunch:
Baked potato bar (save extra for tomorrow and thursday
Dinner:
Spaghetti with approved or homemade tomato sauce
Wednesday:
Breakfast:
Potato fritatta
Lunch:
Pasta salad
Dinner:
chicken salad
Thursday:
Start soup in crockpot for lunch
Breakfast:
hot rice cereal with honey and milk
Lunch:
Potato Cheese soup
Dinner:
Taco salad
Friday
Soak oatmeal for tomorrow morning
Breakfast:
approved cereal and whole milk
Lunch:
Impossible dinner pie
Dinner:
Mac and cheese, veggies
Saturday
Breakfast:
overnight oatmeal
Lunch:
Sloppy joes, salad
Dinner:
approved chilli, tamales, or canned something day
Saturday, February 21, 2009
Reader questions from Laura
Laura commented and asked, "I'm raising my 5 year old grandson. He is so intelligent but is struggling in kindergarten. He was just diagnosed with ADHD combined type and childhood antisocial behavior. I ordered the Feingold program to try to help him. I spent 3 hours shopping the other night to purchase foods he could have.
What do you find the most challenging about the program?
Do you share recipes?
I appreciate your blog as it certainly gives me encouragement and hope."
Laura, good for you for making the change! Shopping will get MUCH easier. I think that one of the most challenging things was actually the beginning shopping. Looking at the food list and looking up every single item that was prepackaged was a bear of a job. I think my first trip was about 3 hours. I was very glad that I didn't take my kids. Here's a couple of tips to make it easier.
Study the food guide at home. Pick out some foods that are brands sold at the local stuff-mart or wherever you shop. Highlight them with a yellow crayon. As you get more familiar with the brands that you like you can use orange to underline them or make a checkmark. I rarely use my food guide anymore. I just bring it along in case of a great sale to check the product.
Second, use a lot of always acceptable ingredients. Not only will this save money but it is much easier to shop when you know you're picking up fruit and veggies, beans, meat, eggs, and whole milk.
I do keep some easy packaged stuff on hand but mostly we eat basics.
I think it took me about a month before I knew which brands I wanted of what and what was really safe. It was about 4 shopping trips. In the beginning we're all excited about the huge food list and we buy tons of "safe junk" just because it's safe.
I'd buy chips once every 6 months before but when we started Feingold I bought 4 different kinds every shopping trip!
We've been doing this for a while now and I honestly don't even think about it anymore. It was only a challenge for the first 3 months. We keep some pre-packaged snacks around for that spur of the moment birthday party or long day, we have homemade beef jerky and fruit roll ups and approved suckers in the car. Our taste buds are used to water so it's very easy to refuse that special drink that someone makes. The kids know that if I don't happen to have an approved treat in my purse that it's easy to wait an hour till we get home and then I'll substitute their treat. And, there's always the fast food guide for real food when we're out. We don't feel like we're missing out on anything...well, Andrew will still sneak sometimes but he's getting TONS better at knowing that I have things at home.
I don't quite understand what you mean by, "do you share recipes?" I think you mean do you share them with friends or those who need to feed your child so I'll address that and if it's not what you mean please let me know otherwise.
Since the Feingold association is a non-profit organization we do not copy the food list or discuss in detail (on a list or blog) the approved foods. They put so much time into research and they need the funds to keep that going. We encourage others who are interested in the Feingold diet to get their own food list. I copied the "Dear Grandma" letter for my family and those caring for my kids (including church workers and friends who watch them) and created my own list of simple foods, and some packaged treats that my kids could have. I also share a product or two on this blog to encourage people that worry about everything being health food and expensive. I want people to know that there are plenty of everyday foods on the list. I share plenty of recipes with those caring for my kids.
There is also the Feingold discussion board that you get a password to when you register. There are many recipes there and since everyone is a member they use brand names to make it easier.
I hope that answered your questions. Feel free to ask more. It helps me know what readers need to hear. That's why I answer all questions online and not privately.
Friday, February 20, 2009
Skill building buddies
http://skillbuildingbuddies.com/
Just a website I found with free videos online to help kids with autism or other people who need to build certain skills.
Just a website I found with free videos online to help kids with autism or other people who need to build certain skills.
Wednesday, February 18, 2009
Just something interesting, science experiment
Today Adam showed me his science experiment from his homeschool co-op. They all grew beans in petri dishes. He happened to be goofing around with his green marker and colored one bean all over. Guess what? He checked them today and most are "literally exploding with life" as he says, and that one bean didn't grow and is molding.
Of course this is just a kid's science experiment and it was just one so it could be a total fluke but we thought it was funny.
We may try to recreate this experiment again but with more beans and just see what happens.
Of course this is just a kid's science experiment and it was just one so it could be a total fluke but we thought it was funny.
We may try to recreate this experiment again but with more beans and just see what happens.
sausage, egg, cheese muffin breakfast sandwiches
This morning we made our breakfast sandwich that we love. You can make this in several ways. I just use an approved sausage from the Feingold food list but you can find plenty of recipes for sausage if you want to buy plain ground pork and make your own.
Today I used rolls made from an approved frozen dough but we've used bagels, homemade rolls, or homemade biscuits. Use gluten free if needed.
We do normal scrambled eggs with salt
And, sometimes a slice of always acceptable cheese, most of the time we skip the cheese but I thought I'd put it here as an option.
Just assemble and eat.
These satisfy that fast food craving and they're so yummy on a cold day. They're also very portable IF you assemble them while the eggs are still a little moist and HOT. As they cool they'll stick together well enough to stay in the sandwich.
A half post, streusel filling for pop tarts
I don't have the rest of this post yet cause I'm not a pie maker but this was posted on a GFCF list as a filling for pop tarts. The egg is so the filling doesn't soak through into the pastry. If you have already made these please leave a comment. I don't like to post things until I've made them.
Cinnamon Streusel Filling for myo "pop tarts"
1/2 c brown sugar
1 to 1 1/2 t cinnamon, to taste
4 t flour
1 large egg, to brush on pastry before filling (we used 1/4 c sweet
potato or carrot puree)
Cinnamon Streusel Filling for myo "pop tarts"
1/2 c brown sugar
1 to 1 1/2 t cinnamon, to taste
4 t flour
1 large egg, to brush on pastry before filling (we used 1/4 c sweet
potato or carrot puree)
Monday, February 16, 2009
Beef Enchiladas with tortillas
This post is a work in progress because I can't find my recipe for enchilada sauce. I just make it cause I remember how but I couldn't give you proportions yet.
So, first you cook a roast in the crockpot all day long. The longer you cook it, the more tender it will be. I just barely cover with water, then add 2 tsp of salt, garlic, onion, and carrots.
When the roast is done pull it apart and set it aside.
Make the tortillas (or use approved)
4 cups flour or GF flour mix with xanthan gum
1 tsp salt
4 tsp baking powder
2 vegetable shortening or coconut oil (if it's coconut oil warm it a little)
1 1/2 cups warm water or more if needed
Mix this all up into a dough, press in a tortilla press or grill for a minute on each side. You can make this without shortening but they won't be as tender.
Sauce
My sauce uses chili powder but no tomatoes so it's lower in salycylate than you might be used to. It's a darker brown style sauce instead of the Americanized tomato sweet spicy sauce.
Dissolve 2 TBSP flour (or gluten free flour mix) in 2 cups of water. Add 2 TBSP of chili powder and 3/4 tsp salt. Cook this over medium heat until thickened. If you're adventurous and know how you can brown the flour in oil first, then add the liquid whisking very quickly. It takes a little practice and sometimes I have to vita-mix it smooth but the browning gives it an extra flavor.
If you're used to canned sauce you can add 1 TBSP sugar to even it out. Add more salt if needed.
To assemble, dip a tortilla in sauce, put in a little beef and shredded cheese if you want. Roll up and either put it on a plate with extra sauce and condiments or put in a casserole dish to freeze or serve. Add extra sauce and sprinkle with cheese.
I like to serve this with homemade pinto beans and salad.
mmmm pumpkin spice or anything else muffins
These are a staple of ours. They are one of the few gluten free baked items that I like so far. Sometimes we skip the pumpkin and add applesauce or another fruit or something else that's a little wet. These muffins are moist so they freeze very well. I freeze them in freezer ziplock baggies and get out as many as I need to thaw. If I need to go quickly I'll thaw them in the oven for 10 minutes at 350 degrees but it dries them out a little. Try to set them out the morning before instead. Since it's a staple the directions are all over the place. Just make sure your batter looks like muffin batter (sort of thick, barely beat it, lumps are good) and that you grease or oil the muffin tins so it comes out ok. I usually double the batch.
2-4 eggs, beaten
1 cup milk, water, or coconut milk
1/4 cup approved oil, approved shortening, or coconut oil
3 cups flour, all purpose, wheat, GF baking mix, or any flour. Millet, brown rice, and white or garbanzo bean is a good combination. If using coconut flour decrease a little, it absorbs liquid like crazy.
1 cup sugar, or 3/4 cup agave or honey, or 1/2 tsp pure stevia plus 1/4 cup other sweetner, or if you're used to stevia 1 tsp pure stevia.
4 tsp baking powder
1 tsp sea salt or other salt
1-2 cups of anything moist like pumpkin, applesauce, or thickly pureed fruit
1-2 tsp spices to go with it. My spice is a combination including cinnamon, ginger, allspice, nutmeg, and corriander.
Heat oven to 400 degrees. Grease muffin tins with an approved oil or butter. Beat eggs and add all wet ingredients. Mix in remaining ingredients just till flour is moistened. Batter should be a little lumpy.
Fill muffin tins 2/3 cups full. Bake 25 minutes or until done. Immediately remove from pan. If freezing, let cool, then package, then freeze.
Give me a break!
Why do people want to fight the Feingold program? Why? Why do people who want nothing to do with Feingold read the blogs about it? Why do people care if someone says symptoms rather than diagnosis? Symptoms sounded right to me and I'm not a linguist. Why can't people understand when others see things happen right before their eyes? They still feel the need to fight. I'm not going to fight with this person. I feel no need. I started this blog to help people and I will continue to help people. If they choose to be offended maybe they should turn off their computer or at least not read my blog.
Sunday, February 15, 2009
Menu #1
I decided that as long as I was doing my own menu I might as well post it here. Some recipes will not work with the always acceptable ingredients but I'll post it anyway. You can always make adjustments as needed. If you're veggies, just sub beans or tofu for the meat. We are gluten free at this point but I haven't made notes of gluten free items. You can make them yourselves or buy gluten free items where needed. Sub what you need to, for instance, instead of bagels use bread etc etc.
I won't always have time to link the menu to the recipes but in the top left corner there's a search box. Just put in a key word and see if I have a recipe.
Monday
(Thaw chicken)
Breakfast
Pancakes, home canned cherries, Fresh squeezed orange juice
Lunch
Pasta and veggies (pasta, butter, salt, garlic, bag of frozen veggies), home canned peaches
Dinner
Spring rolls (rice wrappers) with chicken and veggies, sweet and sour dip, fried rice (rice, bag of frozen veggies, scrambled egg, braggs aminos), fruit salad (if using canned fruit use approved or just fruit and sugar or it's own fruit juice)
Tuesday
(freeze leftover muffins for Saturday, start roast in crock pot, save roast for Wednesday’s enchiladas, make bread if needed)
Breakfast
pumpkin muffins, fruit smoothie
Lunch
Pb and jelly sandwiches, apples
Dinner
Crock pot roast with carrots, mashed potatoes, green salad, canned peaches
Wednesday
(make rolls if needed, make tortillas if needed, start rice)
Breakfast
Breakfast sandwiches (rolls, scrambled egg, approved sausage), fresh squeezed grapefruit juice
Lunch
Fried rice with veggies and scrambled egg
Dinner
beef enchiladas, red rice, green salad, canned cherries
Thursday
Breakfast
approved cereal and milk
Lunch
Bento lunch: approved ham and swiss bagel sandwiches, fruit, approved chips, gummi candy
Dinner
Lentil soup
Friday
(thaw muffins for Saturday’s breakfast)
Breakfast
Oatmeal with pie spice
Lunch
Salmon nuggets with sour cream dill dip, canned fruit
Dinner
Homemade pizza, green salad
Saturday
(thaw chicken for lunch, thaw hamburger and/or beans for taco salad)
Breakfast
Leftover pumpkin muffins, smoothie
Lunch
Chicken soup
Dinner
Taco salad (lettuce, beans, ground beef with garlic, onions, cayenne, and cumin, approved or homemade salsa, approved chips to crush over the top, homemade ranch dressing.), apple crisp
lentil soup
One of my favorite comfort foods for winter is lentil soup. It's on our menu at least once a week in the winter.
2-3 cups lentils
3 potatoes
2 carrots
1 tsp salt
1 bay leaf
water or homemade or approved chicken stock, enough to cover previous ingredients plus a couple of inches
I just put all of this into a pot, cover with water or chicken stock, and cook for about an hour. Sometimes it goes in the crockpot till dinner, usually it's in the pot. Just make sure it doesn't burn on the bottom. Lentils absorb a lot of water.
Good additions are onions, garlic, spices, sour cream (added at the end), butter, tomatoes, or any other veggies you can think of.
Serve alone, with breadsticks, or with a salad.
Saturday, February 14, 2009
Valentines Day

Here's another beautiful cake. This one is the chocolate cake recipe from the Feingold binder. The frosting is regular buttercream but with raspberry juice instead of the milk. MMMMMMMMMM I can smell it now. Thanks Suzanne.
Also, a Valentine's day tip that people use for any holiday with treats. Let your kids leave their bad candy near their bed. Have the Feingold fairy trade it for good stuff in the morning.
Thursday, February 12, 2009
A response to a letter
My response to a very negative letter. I post these things because it helps you all to know the kind of opposition that's out there. This is the reason laws don't pass. So many people really think these things. I wish we could educate everyone.
Her letter...
Maybe I should send you Jane Hershey's phone number so you can meet her and see how rich she is. $80 for a whole year, for a book that has to be updated monthly, 12 issues of a magazine to keep US updated, and a free internet forum for support with no other advertising to make money sounds great to me. Many of the people I know paid $40 for all of that or got it free depending on circumstances. Feingold members do not get anything for "bringing people on board". We get nothing, the products in the book get nothing. We do not get a discount of any sort unless we are financially unable to buy the program.
I just looked up weight watchers last night and it cost $40 a month. That's $480 per year.
The reason we can't share product names, (not recipes) is because that's what the money goes towards. It takes months to research the products within the products to get approved. Hours on the phone that have to be paid. Hours more to make sure the product stays the same. If everyone just gave away the product names there wouldn't be enough money to keep the program going.
And for a program that saved my son's life and his social ability yes, it's absolutely worth $7 a month to have a book and magazines that tell me which products are safe for my kids without me having to do all that personal research.
As for mattering what we take in our mouth, it's the molecular structure of petroleum from coal tar dyes that hurt my children and give my son asthma. We also do not use petroleum on our skin. And believe me, every time the inversion comes around (with pollution petroleum) my son gets a cough again. He is just recovering from a terrible asthma episode because he played outside on a day that I didn't realize was a red day. I wish we could move where the air was clean but unfortunately we can't. Yes, we have air purifiers. We also have a reverse osmosis water system. I care about my son enough that once a month in the hospital and steroids for life just didn't cut it for me. If something is broken, you fix it any way you can. Does any advice anywhere override a parent's inspiration? Feingold is just another piece of advice and I have been inspired to follow it. This truth is available to everyone and it is free if you are willing to call the manufacturer of everything you eat and expect said manufacturers to be honest with you without being made to sign a truth agreement like they have to in order to be in the Feingold list. They may or may not listen to you or answer your question because you are a single person rather than an organization.
The reason I care about a teensy amount that's found in a box is because it absolutely affects my son. I can't "make up" peeing the bed or asthma when we have it, even if I could possibly make up behavior issues. Somehow the people at co-op and church know when to ask me, "gee has he had petroleum today?" after he's punched 2 people in the stomach and is running around like a wild man and go figure, we had something the night before that wasn't approved. I called Feingold and we found out that it had TBHQ in it.
There is also dirt in everything, we can't get it all out, but I don't see you serving it in a bowl to your kids for dinner.
Her letter...
Why does it matter SO much about the petroleum you take in through your mouth? What about the petroleum that's in everything around us, including the water that comes from our taps and the air we breathe? Wouldn't those have just as much of an adverse affect, if not more so in some instances, than the teensiest bit of petroleum one might find in a certain food product's container? I do understand not wanting to take into our bodies things that are unnatural and unhealthy, but it seems that Feingold is taking it to the extreme.
If a person truly wanted to be free of petroleum (and other pollutants) they would be like some people who live in homes out in the middle of nowhere, with special air filters, special foods, special clothing, etc. Of course, they never leave their homes. How do you buy gas, drive on the road, deal with the inversion, keep your water clear, insure that your clothing, furnishings and other finishes are petroleum-free, etc.? How are your sure you've had a reaction to food and not something else in the environment? How do you determine that a child's hyperactivity, or other undesirable behavior, is a result of petroleum and not just normal, age-related behavior?
(Also, as a side note, just because an organization says it's 'non-profit' doesn't mean the people running it aren't making a huge salary. It just means the organization itself doesn't make a profit. Credit unions and most hospitals are non-profit and the people running them are very wealthy. Which reminds me of another question: Don't Feingold members get a discount if they bring other people on board?)
I do find it enormously suspicious that something so important as Feingold claims to be is also very expensive and very exclusive (you're not supposed to share recipes, etc.). My personal experience with truth is that it's available to everyone and it's free. Do Feingold's claims override the inspiration parents are entitled to for their own children, especially when it comes to treating them for specific conditions?
And, my response...
And, my response...
Maybe I should send you Jane Hershey's phone number so you can meet her and see how rich she is. $80 for a whole year, for a book that has to be updated monthly, 12 issues of a magazine to keep US updated, and a free internet forum for support with no other advertising to make money sounds great to me. Many of the people I know paid $40 for all of that or got it free depending on circumstances. Feingold members do not get anything for "bringing people on board". We get nothing, the products in the book get nothing. We do not get a discount of any sort unless we are financially unable to buy the program.
I just looked up weight watchers last night and it cost $40 a month. That's $480 per year.
The reason we can't share product names, (not recipes) is because that's what the money goes towards. It takes months to research the products within the products to get approved. Hours on the phone that have to be paid. Hours more to make sure the product stays the same. If everyone just gave away the product names there wouldn't be enough money to keep the program going.
And for a program that saved my son's life and his social ability yes, it's absolutely worth $7 a month to have a book and magazines that tell me which products are safe for my kids without me having to do all that personal research.
As for mattering what we take in our mouth, it's the molecular structure of petroleum from coal tar dyes that hurt my children and give my son asthma. We also do not use petroleum on our skin. And believe me, every time the inversion comes around (with pollution petroleum) my son gets a cough again. He is just recovering from a terrible asthma episode because he played outside on a day that I didn't realize was a red day. I wish we could move where the air was clean but unfortunately we can't. Yes, we have air purifiers. We also have a reverse osmosis water system. I care about my son enough that once a month in the hospital and steroids for life just didn't cut it for me. If something is broken, you fix it any way you can. Does any advice anywhere override a parent's inspiration? Feingold is just another piece of advice and I have been inspired to follow it. This truth is available to everyone and it is free if you are willing to call the manufacturer of everything you eat and expect said manufacturers to be honest with you without being made to sign a truth agreement like they have to in order to be in the Feingold list. They may or may not listen to you or answer your question because you are a single person rather than an organization.
The reason I care about a teensy amount that's found in a box is because it absolutely affects my son. I can't "make up" peeing the bed or asthma when we have it, even if I could possibly make up behavior issues. Somehow the people at co-op and church know when to ask me, "gee has he had petroleum today?" after he's punched 2 people in the stomach and is running around like a wild man and go figure, we had something the night before that wasn't approved. I called Feingold and we found out that it had TBHQ in it.
There is also dirt in everything, we can't get it all out, but I don't see you serving it in a bowl to your kids for dinner.
Wednesday, February 11, 2009
Yes, you can decorate a cake!
 This cake was decorated by Karen on the Feingold list. She used all natural coloring and it's Feingold safe! I just wanted to post this as an inspiration to let you know that you don't need little bottles of petroleum to make a cute cake.
Sunday, February 8, 2009
Garbanzo Bean Winter Vegetable Stew
Garbanzo Bean Winter Vegetable Stew
 I saw this recipe title somewhere. No idea where. Can't find it anywhere online. I bought a can of garbanzo beans, an acorn squash and a butternut squash. But no recipe to be found. So here's what I did...
Ingredients
1 can garbanzo beans ($.99)
2 tsp extra virgin olive oil ($.10)
1 cup chicken broth (free from last night's chicken) (note from Danika, use approved broth in a combination to 4 cups or make your own chicken or veggie broth)
3 cups vegetable broth (free) See instructions here
1 small acorn squash ($.94)
1 small butternut squash ($1.07)
1 box frozen spinach ($.50)
1 tsp garlic powder ($.01)
Salt/Pepper
2 tsp honey ($.15)
2 tsp green curry paste ($.25)
1 cup rice, uncooked ($.20)
**Note: Rice + Garbanzo bean = complete protein
Directions
1. In large saucepan, add olive oil and garbanzo beans. Saute 2-3 minutes. Add chicken broth and vegetable broth.
2. Microwave butternut squash for 3 minutes. Remove and let cool. Microwave acorn squash for 3 minutes. Remove and let cool. Reason: Peeling and cutting are much easier after their skins have been softened. Once cool, peel skin off with peeler or knife. Cut in half lengthwise and scoop out seeds. Cut both squash into 1/2' square cubes. Add to broth.
3. Peel and cut carrots into circles. Add to soup.
4. Microwave spinach packet according to package instructions. Remove from plastic and add to soup.
5. Add spices, curry paste and honey to stew. Stir through. Cover and cook for at least 45 minutes on medium-low heat.
6. Cook 1 cup rice in 2 1/2 cups water. Bring water to boil. Add rice. Return to boil, cover and reduce heat. Simmer for 20 minutes. Fluff with fork.
7. Serve stew with side of rice or serve stew over rice. A healthy and colorful dish!
Cost $4.21
Pasta Fagioli Soup
http://www.5dollardinners.com/2009/01/pasta-fagioli-soup.html
Pasta Fagioli Soup

Suggested sides for soups...coming later in the week!
Ingredients
3/4 lb ground beef ($1.11)
5 cups water (I didn't use broth and it turned out FINE!)
1 15 oz can of diced tomatoes ($.23)
1 6 oz can tomato sauce ($.33)
1 cup dried red kidney beans ($.40)
2 carrots ($.30)
2 stalks celery ($.20)
1/2 onion ($.20)
2 tbsp italian seasoning (note, use approved or just use oregano and garlic plain)
2 tsp garlic powder
salt/pepper
8 oz pasta (use rice pasta to keep it GFCFSF) ($.99)
2 heads broccoli ($.75)
Directions
1. Brown and drain ground beef.
2. Chop onion, carrots and celery.
3. Add ground beef, onion, carrots, celery and water to crockpot. Add canned tomatoes and tomato sauce. Add dried beans (yes, this is OK!). Add italian seasoning, garlic powder and salt and pepper to taste. Set crockpot on low for 8 hours.
4. Add pasta about 1 hour before crockpot cooking finishes up.
5. Steam broccoli in steamer for 3-4 minutes.
6. Serve soup with side of steamed broccoli.
Cost $4.31
This recipe made a LOT...there will be plenty of leftovers for tomorrow!
Fruit "snacks" or in other words, a fruit bowl centerpiece

This picture is from Rocks in my Dryer...
She talked about how the kids actually eat fruit if it's used as a centerpiece. I absolutely agree. We order most of our food through Azure Standard cause we save so much money there. As part of that, I look through the produce and order whatever is cheapest. You can order small but since we order once a month I usually get 10 or 20 lbs of a fruit. Hey, where else can you get 20 lbs of snack food for $14?
When bananas go on sale you're talking 39 cents a lb. Packaged fruit snacks are $5/lb for comparison.
Some goes in my cold storage, some goes in the fridge, and some goes in the fruit bowl. We keep the fruit bowl full as we need and it always disappears quickly.
The great thing about it is that the kids know they can always have fruit and they don't ask me for snacks. This saves tons of money and sugar AND baking time! My kids do well with apples, pears, mangoes, and bananas. The other fruit that's high in salycylates we limit a little more.
Stuffed Green Peppers
http://www.5dollardinners.com/2009/01/stuffed-green-peppers.html
Stuffed Green Peppers
 I've done it! I've really done it! I made a meal that costs more than 5 smackers!!! I wasn't sure that was possible anymore!
I saw this recipe in a Taste of Home Slow Cooker Recipe book. I just HAD to try it. I knew if I didn't get the green peppers on sale the meal would be way over. I was right! Even if they had been on sale, I think I'd still have gone over! Oh well. Can y'all forgive me this once???!!!
Also, wanted to say thanks for all the great advice from yesterday's "dried steak" fiasco !
And make sure you stop by this week's $5 Dinner Challenge for even more great frugal recipe ideas!
Ingredients
4 large green peppers ($3.96) *gasp*
1/2 cup rice, uncooked ($.10)
1/2 lb ground beef, cooked ($.75)
1 can Rotel diced tomatoes and green chiles ($.37) But these are free at Kroger this week!
1/2 cup frozen organic corn ($.25)
1/2 cup shredded cheddar cheese ($.37) Do not add if GFCFSF! (whole milk cheese with annatto if colored)
3 medium sweet potatoes ($1.39)
Directions
1. Cook 1/2 cup rice in 1 1/4 cup of water. Bring water to boil. Add rice and return to boil. Cover and reduce heat. Simmer 20 minutes.
2. Add can of Rotel, frozen corn and cooked ground beef to the saucepan with the rice. Mix well.
 3. Cut the tops off of each bell pepper and remove the seeds and stem.
4. Scoop rice and meat mixture into each bell pepper. Place bell peppers into the crockpot. Cook on low for 4 or 6 hours. About 15 minutes before serving, add shredded cheese to the tops of each pepper. Let cheese melt.
5. Slit sweet potatoes with knife or vent with fork. Bake sweet potatoes at 350 for 1 hour in baking dish with 1/4 inch water. Cover with foil. Remove and let cool about 10 minutes. Peel skins off of the potato and mash. Serve with cinnamon and butter if you like. We eat them "plain".
6. Serve stuffed bell peppers with a side of mashed sweet potatoes.
Cost $7.19 WAY OVER :(
(note from Danika, I rarely buy peppers cause they cost so much but in the summer we have a garden and they grow very easily.)
http://www.5dollardinners.com/2009/02/super-bowl-snacks-and-dinner.html
Ingredients
1 cup green lentils ($.25)
1/2 cup split peas ($.15)
4 cups water
3 cloves garlic, crushed ($.10)
5 green onions ($.40)
1 can Rotel ($.37) (note from Danika, use canned or fresh tomatoes)
Salt/Pepper
1 cup uncooked brown rice ($.40)
Guacamole ($2-3) (optional garnish)
Directions
1. In large saucepan, bring water to boil. Add lentils and split peas. Return to boil and reduce to medium high heat and cook for 30 minutes, until lentils and split peas are soft. As the lentils are cooking, add Rotel, crushed garlic, diced green onions and some salt and pepper to taste.
2. Cook 1 cup brown rice with 2.5 cups of water. Bring water to boil. Add rice and return to boil. Reduce heat and simmer for 50 minutes.
3. Serve spicy lentil chili over brown rice. Top with homemade guacamole.
Chicken pot pie bowls
http://www.5dollardinners.com/2009/02/chicken-pot-pie-bowls.html
Chicken Pot Pie Bowls
BIG Thanks! I wanted to say thanks to those who voted for me at the BlogNet Awards. I WON for the month of January, and have been added to the best blog of the year award list for 2009. Thanks!!!I take no credit for this recipe. I found it in the February edition of Rachael Ray magazine. Not only is it super creative, but it's a GFCF(and SF) version of one of my favorite meals! I just about jumped out of my seat when I saw the article. RR doing an article on food allergies! Yippee!!!
 Here's my spin. It's pretty close to the article's recipe.
Ingredients
2 chicken breasts ($1.77) About 1 lb!
2-3 tsp extra virgin olive oil ($.10)
1 tsp garlic powder ($.01)
Salt/Pepper
1-2 Tbsp mustard ($.05)
1.5 - 2 lbs of white potatoes ($1.19)
1/2-1 cup of milk ($.08)
1 Tbsp butter or olive oil ($.15) See GFCFSF potatoes here
Salt/pepper
1 16 oz bag frozen mixed veggies ($.99)
Directions
1. Place chicken breasts in 8x8 glass baking dish. Sprinkle with olive oil, garlic powder, salt and pepper. Bake at 350 for 45-55 minutes.
2. Thaw frozen veggies.
3. After chicken is done cooking, cut into 1/2 inch - 1 inch cubes. Combine cubed chicken with frozen veggies. Add 1 Tbsp mustard and stir through.
3. Make mashed potatoes: Scrub and peel potatoes. Cut into quarters. Boil until tender (about 10 minutes). Drain and place in bowl. Add butter (or olive oil), milk (or rice milk) and salt and pepper. The consistency of the mashed potatoes needs to be thick. So add milk carefully!
4. Place mashed potatoes on plate, make a well to fill in with the chicken and frozen veggie mixture.
5. Serve chicken pot pie bowl. This will surely be a new favorite!!! We did not have a side dish with this. I made too many potatoes so we had plenty. The article suggests a salad with cherry tomatoes.
(note from Danika, I would also make a sauce with a cup of whole milk or approved rice milk and a TBSP of arrowroot powder to make it more like a pot pie.)
Just a note
I found some recipes on a blog someone sent me (baking beauties), I've copied a few down that will work with Feingold and they also happen to be gluten free. Most on the blog would either not be Feingold safe or would need approved ingredients. My blog however, is mostly always acceptable ingredients so please pop over to her blog if you have a Feingold list.
Corn tortillas
http://thebakingbeauties.blogspot.com/2008/05/corn-tortillas.html
Corn Tortillas

Source: Simply Recipes
Before you start
You can make the tortillas completely by hand, by forming a thin pancake with the dough between your hands. But unless you are somewhat experienced in this method, you'll get more consistent results by using a tortilla press. These too are available in Mexican markets and come either in wood or cast iron. They are available online at Amazon.com. You can also roll out the masa with a rolling pin, between pieces of wax paper.
Making the Masa Dough
To make 16-18 tortillas, start with putting 2 cups of masa flour in a large bowl. (Hint: for added "lift" you can mix in 1/4 teaspoon of baking soda.) Add 1 1/2 to 2 cups of very warm water to the masa flour (according to the directions on the package, some brands may call for different amounts of water). Mix in and let sit for 5 minutes or so. Begin working the masa with your hands to make the dough. Work the dough for several minutes. Press the dough with your fingers and the palms of your hands as if you were kneading bread dough. If at any point through the tortilla making process the dough seems too dry or too wet, add a little more water or masa to the dough.
Take a piece of the masa dough and shape it into a ball the size of a plum, or slightly large golf ball. Make about 16-18 balls from the dough.
Pressing the Tortillas
Take two pieces of wax paper or plastic from a plastic bag and cut them to the shape of the surface of the tortilla press. Open the tortilla press and lay one piece of wax paper on the press. Place the masa ball in the center. Place another piece of wax paper over the masa ball. Gently close the press and press down, until the dough has spread to a diameter of 6 inches.
Cooking the Tortillas
Heat a griddle or a large skillet on high heat. Working one at a time, hold a tortilla in your hand, carefully removing the wax paper on each side. Allow the tortilla to rest half on your hand, and half hanging down, and gently lay the tortilla down on to the skillet. Start working on pressing the next tortilla. Cook the tortilla on the hot pan for 30 seconds to a minute on each side. The tortilla should be lightly toasted and little air pockets forming.
Remove the tortillas to a tortilla warmer lined with dish towel or paper towels, or wrap them in a dish towel to keep them warm. Serve immediately or refrigerate and reheat.
(note from Danika, I was sick of the waxed paper and I bought a tortilla maker that's a tortilla press and a cooker all in one. It was only $19.99 at stuff mart and I wouldn't trade it for the world. It is one of my few non-stick appliances that I won't get rid of.)
Brown Rice Waffles
http://thebakingbeauties.blogspot.com/2008/05/brown-rice-waffles-gluten-free.html
Brown Rice Waffles (Gluten Free)

Unfortunately, I can't remember where I found this recipe. If anyone knows, please let me know, as I'd like to give credit to the website I found this one.
2 cups brown rice flour
1 cup buttermilk or sour milk (milk and vinegar)
2 Tbsp oil (note from Danika, use melted butter, melted coconut oil, or approved oil)
1 tsp. real vanilla extract (or your favorite; maple, almond or walnut)
1 tsp salt
1 Tbsp. sugar
Mix the above. Add some water if too thick or too dry. Then add:
2 eggs
1 tsp. baking powder
1/2 tsp. baking soda
Mix well. Let batter sit for 1/2 hour. Preheat waffle iron. Oil it well and as often as needed while making the waffles. Make waffles following iron manufacturer's instructions.
Herbed Corn on the Cob
http://thebakingbeauties.blogspot.com/2008/08/herbed-corn-on-cob-grilled-in-foil.html
Herbed Corn on the Cob Grilled in Foil

Mmm...fresh corn on the cob. What a handy way to eat corn. It's like God put it on a stick for us, and we all know how much fun food is to eat that comes on a stick (like Popsicles and corn dogs, for example). Today I saw a road-side stand selling fresh corn on the cob, so it is just starting to be ready to pick here in Manitoba. Here is a fantastic way to make your corn on the cob. It is flavourful, crisp, and super easy to do.
Source: Recipezaar
Ingredients:
6 ears fresh corn, cleaned
6 Tbsp sweet butter, softened
1 tsp salt
1 tsp sugar
1 tsp fresh basil
1 tsp thyme
1 tsp parsley
1 tsp rosemary
6 pieces aluminum foil, big enough to wrap corn
Directions:
1. Place one corn on each foil.
2. Mix remaining ingredients together and rub into each cob.
3. Wrap foil up around the corn and grill for 15 minutes, turning often.
(note from Danika, If you don't have corn on the cob just use a bag of frozen sweet corn and add the herbs)
Tropical Sorbet
http://thebakingbeauties.blogspot.com/2008/09/pina-colada-sorbet.html
Pina Colada Sorbet
Before I get on with today's recipe, I'd like to wish my In-Law's a
Happy 40th Wedding Anniversary!
Wow, 40 years.
That is over 14,600 days of making the choice to stay married.
WELL DONE! Congratulations!

Happy 40th Wedding Anniversary!
Wow, 40 years.
That is over 14,600 days of making the choice to stay married.
WELL DONE! Congratulations!
Summer isn't gone yet! At least I haven't posted all my summertime recipes yet, so the season can't be done yet. :) This sorbet was simple to make, had only a few ingredients, but tasted fantastic! Definitely a welcomed treat.
Source: AllRecipes.com
Ingredients:
1 1/2 cups white sugar
1 1/2 cups water
1 (20 ounce) can canned crushed pineapple, drained
1 (13.5 ounces) can coconut milk
1/4 cup lime juice
Directions:
1. Make a syrup by bringing the sugar and water to a boil in a small saucepan over high heat. Stir and boil until the liquid becomes clear, about 1 minute. Set aside to cool.
2. Blend the drained pineapple in a blender or food processor until very smooth and frothy. In a large bowl, whisk together the syrup, pineapple puree, coconut milk, and lime juice. Refrigerate until chilled, about 3 hours.
3. Freeze in the freezer canister of an ice cream maker according to manufacturer's directions.
Gluten Free Brownies
http://thebakingbeauties.blogspot.com/2008/11/gluten-free-brownies.html
Gluten-Free Brownies

After reading this recipe on Mennonite Girls Can Cook (and yes, they can) I knew this was a recipe I wanted to try. I found some coconut flour at Bulk Barn when we went to the city, and have since gotten more, so I can make more brownies. :) These made really, really good brownies. Not too cake like, and not too fudge like. Just perfect! When you have a minute, head on over to MGCC the next time you're looking for a recipe. With 14 contributors to the blog, you're sure to find a recipe that you like!
Source: Mennonite Girls Can Cook
Ingredients:
- 1/3 cup coconut oil (or butter)
- 1/2 cup cocoa powder
- 6 eggs
- 1 cup sugar
- 1/2 tsp salt
- 1/2 tsp vanilla
- 1/2 cup sifted coconut flour (*See Note)
- 1 cup nuts chopped
Directions:
- In a saucepan at low heat, melt butter and blend in cocoa powder.
- Remove from heat and let cool .
- In a bowl, beat together eggs, sugar, salt and vanilla .
- Stir in cocoa mixture.
- Add well sifted coconut flour and whisk the batter well until there are no lumps.
- Fold in the nuts.
- Pour batter into a greased 8" or 9" square baking pan.
- Bake at 350' for 30-35 minutes.
*NOTE: Coconut flour very quickly absorbs so the batter may look thin at first ! 1/4 cup of coconut flour is equal to 1 cup of regular flour. (note from Danika, ahhhh no wonder my coconut stuff comes out too dry, I was trying to thicken the batter)
Gluten free sandwich bread
http://thebakingbeauties.blogspot.com/2009/02/another-wonderful-gluten-free-sandwich.html
Another Wonderful Gluten-Free Sandwich Bread

I got this recipe from a gal in our church (the best receptionist ever actually HI CRYSTAL!), and she got it from another gal in our church (Hi Stephanie!), and I have no idea where Stephanie got it from. But whoever gave these gals the recipe ought to be thanked! I'm so happy when great recipes get passed along like this, then you KNOW they are winners, otherwise, we'd all just pretend that we never even tried that recipe, and move on, right? :)
This bread was simple to make, rose great in a standard bread pan, was soft, and when fresh, isn't crumbly at all. I did find it to be a wee bit crumbly after being frozen, but not as bad as some of the recipes I've tried in the past. It tastes SO good! If you're a celiac, you know it's hard to find good bread recipes. I'm so thrilled to have found as many great breads as I have in the few months I've been gluten-free. LOVE IT! And I absolutely LOVE when others share their gluten-free recipes with me. It's a great gift to receive tried & true recipes. :) I hope you guys enjoy this bread as well (I just did...topped with some pear marmalade...DELICIOUS!).
Ingredients:
- 1 cup warm water
- 2 tsp instant yeast
- 2 Tbsp granulated sugar
- 1 1/4 cup brown rice flour
- 1/2 cup ground flax
- 1/2 cup potato starch
- 1/4 cup tapioca starch
- 1/4 cup skim milk powder
- 2 1/2 tsp xanthan gum
- 1 1/4 tsp salt
- 2 tsp apple cider vinegar
- 2 Tbsp vegetable oil
- 2 eggs
- 2 egg whites
- Combine warm, yeast & sugar in a glass bowl. Stir & let sit 5 minutes. This allows the yeast to proof & shortens rising time.
- In a large bowl or plastic bag, combine dry ingredients. Mix well and set aside.
- In a separate bowl, using a heavy-duty mixer with paddle attachment or dough hook, combine remaining ingredients until well blended. Add water/yeast mixture & combine.
- With mixer on lowest speed, slowly add dry ingredients until combined. Scrape bottom and sides of bowl with rubber spatula. With mixer on medium speed, beat for 4 minutes.
- Spoon into prepared bread pan or mini-loaf pans. Let rise, uncovered, in a warm, draft-free place for 30-40 minutes, or until dough has risen to the top of the pan.
- Meanwhile, preheat oven to 350 degrees F. Bake for 35 to 45 minutes or until loaf sounds hollow when tapped on the bottom of single loaf.
- Slice and wrap while still warm in airtight individual sandwich bags, then place these in a larger freezer bag. Freeze up to 6 weeks.
- Bake 12 minutes for 11 mini loaves. Freeze 2 loaves/sandwich bag.
Gluten Free Old Fashined Doughnuts
http://thebakingbeauties.blogspot.com/2008/08/gluten-free-old-fashioned-doughnuts.html
Gluten Free Old Fashioned Doughnuts

Yes folk, that's right, gluten-free donuts! These were actually really simple to make, and they tasted just like the donuts that you get fresh at the summer fairs, all covered in a cinnamon-sugar coating.
I bought myself a donut cutter the other day when we were in the city. I don't really know why, I had never even successfully made donuts before going gluten-free. What was I going to do with it now that I couldn't even eat my failed yeast donuts? Well, I decided to look online for a gluten free donut recipe. Lo & behold, there it was! And on a side note; what on earth did anyone do before the internet anyway??? Going gluten-free would have been horrible back then! Anyway...
The next time I make these donuts, I think I will skip the donuts, and make them all into donut holes. The donut holes are such a nice little size to just pop into your mouth while walking past the platter of donuts (don't ask how many I ate that afternoon, yikes). Like all GF baking, it is best when fresh, however, it can be frozen & reheated in a 350 degree F oven when you want to serve them too. These were awesome, and I didn't even miss not being able to buy them at the local festivals this year (why would I when I have them in my own kitchen??).
Source: GFUtah.org
Ingredients:
- 2 eggs, beaten
- 2 cups buttermilk
- 1/4 cup butter, melted
- 5 cups rice flour blend (*see note)
- 1 cup sugar
- 2 tsp baking soda
- 1 tsp baking powder
- 2 tsp salt
- 2 tsp xanthan gum
- 1 tsp nutmeg
Directions:
1. Combine eggs, buttermilk, and melted butter in a large bowl. Mix well with a wire whisk or fork.
2. Combine dry ingredients in a separate bowl and add to the wet. Mix by hand with a large spoon. (Do not use an electric mixer).
3. Let batter rest for about 15 minutes. Turn dough onto a well-floured surface. If dough is sticky, work in more rice flour blend.
4. Roll dough 1/2" thick. Cut with a doughnut cutter.
5. Fry in 1 to 3 inches of very hot oil (375 degrees F) until brown on one side. Turn doughnuts over and brown on second side.
6. While doughnuts are still warm, toss in a mixture of white sugar & cinnamon to coat. Serve warm.
*NOTE: Rice flour blend is 6 parts rice flour, 2 parts potato starch, and 1 part tapioca starch.
Friday, February 6, 2009
Not a success story but a story
This is from a friend who has a private blog...I'm the kind friend, LOL
"That night C.S. and I had a date night on the fly. We picked up some take out, and brought it back home. I was having a massive craving for sushi, so I went to a local Japanese restaurant and got some. I, erroneously, thought that if it was a reputable restaurant they won't use artificial colors and flavors. So I got myself some smoked salmon Alaska rolls. Oh, they were so good!!! But then it started - the freaking out over everything, the feel of every single heartbeat, the brain never resting. I hardly slept at all that weekend. When I discussed this with my friend, who introduced me to Feingold, she informed me that salmon is usually infused with red #5 to make it pink. Well, the stuff I ate was not pink, it was red! So that is what did it!! It was really scary. By Sunday night I though I was going to die, I thought a heart attack was on its way. But, whenever I did the Wii Fit, my heart did not hurt worse. Logically, I knew I wasn't having a heart attack, but I was not in a normal state of mind, and I was almost going to go to the hospital. Then I found some natural sleep aids in the medicine cabinet, and tried them, and was finally able to sleep for more than an hour at a time. Then Monday, I was feeling a little better. By Tuesday it was over. Red #5 is not OK!!!"
"That night C.S. and I had a date night on the fly. We picked up some take out, and brought it back home. I was having a massive craving for sushi, so I went to a local Japanese restaurant and got some. I, erroneously, thought that if it was a reputable restaurant they won't use artificial colors and flavors. So I got myself some smoked salmon Alaska rolls. Oh, they were so good!!! But then it started - the freaking out over everything, the feel of every single heartbeat, the brain never resting. I hardly slept at all that weekend. When I discussed this with my friend, who introduced me to Feingold, she informed me that salmon is usually infused with red #5 to make it pink. Well, the stuff I ate was not pink, it was red! So that is what did it!! It was really scary. By Sunday night I though I was going to die, I thought a heart attack was on its way. But, whenever I did the Wii Fit, my heart did not hurt worse. Logically, I knew I wasn't having a heart attack, but I was not in a normal state of mind, and I was almost going to go to the hospital. Then I found some natural sleep aids in the medicine cabinet, and tried them, and was finally able to sleep for more than an hour at a time. Then Monday, I was feeling a little better. By Tuesday it was over. Red #5 is not OK!!!"
Cafe Rio copycat dinner
this is on my friend's private blog...looks delicious
Another craving I have had is Mexican food! We finally got to a point in Stage 2 Feingold where we could add in peppers, so I went all out today, and made some yummy Mexican food. It was really good!! I googled "Cafe Rio" recipes, and this is what I found:
Another craving I have had is Mexican food! We finally got to a point in Stage 2 Feingold where we could add in peppers, so I went all out today, and made some yummy Mexican food. It was really good!! I googled "Cafe Rio" recipes, and this is what I found:
Pork
3 to 5 pounds pork roast
1 bottle taco sauce (I used Rosarita verde taco sauce) (note from Danika, I don't know if this is gf)
1 Tablespoon cumin
1 cup brown sugar (C&H)
1 can Coke (I think any soda will work, you need the sweetness, and then thecarbonation for tenderizing.)
Cook pork in slow cooker on low for 6 hours. Shred the meat. Then put the sauce in a pot, and boil for about 5 minutes, add the shredded pork, and stir.
Lime Rice
In a soup pot, saute:
2 Tablespoon butter
1 yellow onion, chopped
4 cloves garlic, minced
Then add:
6 2/3 cups chicken broth (approved or homemade)
1/2 bunch cilantro, chopped
2 teaspoon cumin
2 sm. cans diced green chilies (I omitted these)
1 Tablespoon lime juice (approved or fresh)
1/2 teaspoon pepper
3 1/4 cups rice
Bring to boil. Then reduce heat, and let simmer until rice absorbs all liquid and is tender.
Then I heated up some approved refried beans, and some black beans (I used S & W) with salt and a few drops Tabasco sauce. I served these with warm tortillas (Don Pancho), piled on the refried beans, black beans, rice, meat and salsa. (I would have added sour cream, too, but I bought the 'light' stuff by accident.) It was really yummy! This makes A LOT! You may want to halve it, or save it for a party. Or, do like we will do, and have it for lunch tomorrow, and the next day, and the next . . .
Tuesday, February 3, 2009
Turkey Salad, easy lunch
Today we had a very easy lunch that hit the spot, thought I'd post...
We used bagged spinach and lettuce, shredded a carrot and some whole milk white cheese, and opened a can of turkey (just had turkey, water, and salt).
For dressing I put a blop of approved mayo on the top, you could use approved yogurt or sour cream with just cream listed.
It was a yummy and easy meal.
Monday, February 2, 2009
YAY! My Lara bars worked!

oooh yummy! My bars worked. I made a trial run since I only had salycylates (raisins) for a stick together item.
My next batch will be bigger when I get my Azure Standard order. They have non-preserved almonds, dates, and figs. I called the manufacturers just to be sure.
We've been searching for some Gluten and Casein free portable items to keep in the purse and these will be a really nice change from stupid perky-o's.
These bars have raisins (checked to make sure they have no flour dusting), sunflower seeds, coconut shreds, and carob powder. I did boil the raisins with a bit of water first to make sure they were plump enough so the mixture would hold plenty of carob powder. Baby is very low on iron and the carob is good for that.
They turned out very yummy and I'm so excited to get my almonds, dates, and figs!
I made them into a basic shape, wrapped, and then squished a little better. If anyone knows how long these last please let me know. I put them in the fridge for now just in case.
Homemade Lara bars, a quick snack

http://www.wellsphere.com/healthy-cooking-article/homemade-lara-type-bars-energy-bars-part-3/191669
This is a great blog post about homemade Lara bars. If you don't have a Feingold list please verify that you're using preservative free nuts and fruit. I like the stuff from Azure Standard. Lots of nuts are preserved in the packaging so they won't go bad.
****edited to add**** I spoke with a friend today who was going to soak the nuts first to bring out the enzymes. They would be a different texture and not hold together with the sticky if you do this however, you can follow nourishing traditions and soak the nuts for a night, then drain and dehydrate them. Chop them up afterwards. If you have all dry ingredients they should stay good in your cupboard for a while. If you have wet ingredients you'll need to refrigerate.
Also, a caution, these are so compact and full of potent, no water food. Drink plenty of water when eating nuts or dehydrated foods. If you don't you'll pay the price with constipation. If you drink lots of water while eating larabars they're somewhat cleansing.
Here's the article on wellsphere...
Apologies for this post being a few days late, but my love for LARA bars demanded several tries and multiple flavor variations before posting—I really wanted to get this as close to the real thing as possible.
Whether you’ ve heard of them or not, LARA BARS are one of the very best energy bars on the market, largely because they are made from a short list of real food ingredients: nuts, fruits and spices. In addition to their inarguable yummy- ness , they boast the following assets:
Unprocessed - Raw - Non- GMO - Gluten Free - Dairy Free - Soy Free - Vegan - Kosher.
For comparison sake, take a look at the Lara bar ingredients and the ingredients for another apple- ish flavored bar on the market (made by Powerbar ):
LARABAR : Apple Pie Flavor (from http://www.larabar.com/ )Dates, Walnuts, Unsweetened Apples, Almonds, Raisins, Cinnamon
Powerbar : Apple Cinnamon Flavor (from http://www.powerbar.com/ )High Fructose Corn Syrup With Grape And Pear Juice Concentrate, Oat Bran, Maltodextrin , Milk Protein Isolate, Rice Crisps (Milled Rice, Rice Bran), Brown Rice Flour, Almond Butter, Apple Powder, Natural Flavor, Glycerin, Soy Protein Isolate, Cinnamon and Peanut Flour.CONTAINS ALMOND, MILK, PEANUT AND SOY INGREDIENTS.
Umm , glycerin.
The only downside to LARA bars is that once you try them, you love them, and you’ ve got to have them. And at about $1.60 to $2.00 per bar, times three family members (yes, baby likes small bites of them, too), it starts to get pricey. Hence my ersatz, but equally enchanting, rendition.
Just me and my food processor…
A few raw ingredients, and no cooking required? Replication seemed possible. I found a handful of blog posts with recipes for homemade LARA-type bars, but they didn ’t sound like they could possibly be correct.
The primary problem was that quite a few recipes pushed for a one to three ratio of fruit to nuts. I tried it, and my suspicions were correct: far too many nuts, nowhere near enough fruit (an easy give-away: if there were so many nuts, it would always be listed as the first ingredient on the LARA BAR packaging; it is not).
In addition, the specifications for each of the steps (how fine to chop/process the nuts and fruits, how to blend, etc) were vague.
After a few delicious rounds of testing, I think I’ ve got a good facsimile; Kevin agrees, and baby Nick kept pleading, “More! More!”.
So here’s what to do for two bars (and this can be doubled, tripled, quadrupled, etc; it only depends on the size of your food processor). I’m using cherry as my main example, but I’ ve listed some variations below. You can be as creative as you like with the combinations.
Raw or Toasty—It’s Up to You
The Raw Foods Movement is fascinating, but if the raw angle does not matter to you, and you have a bit of extra time, consider lightly toasting the nuts; it boosts the flavor significantly (but truth be told, I still like the raw flavor best). Or, if you like salty-sweet, you can opt for roasted, lightly salted nuts—yum!
.
Bars, Shmars ...
There is no rule saying you have to shape these into bars; you can shape them into little truffle shapes or squares (see photo 6). It's a great candy alternative (and this comes from someone with a not-so-secret affection for sour fruit jelly bellies).
Very Cherry Bars (use as a template for almost any combination)
LARA BARS use a multi-layer package that keeps out UV light and oxygen, which, in turn, maintains freshness without the use of preservatives. I use plain old plastic wrap and my refrigerator, then pop one in my bag when I’m ready to go.
1/4 cup chopped dates (roughly chopped whole dates, not pre -chopped)
1/4 cup dried cherries or dried cranberries
1/3 cup whole pecans, almonds or walnuts
1/8 teaspoon cinnamon
Set out two pieces of plastic wrap for shaping and wrapping the bars. Do this first; you’ll have sticky fingers when you need it.
Place the dates and cherries in a food processor. Pulse until processed to a paste (photo 1). Transfer paste to a medium bowl (don’t clean processor).
Add the nuts to the processor and pulse until finely chopped (photo 2). Add the nuts, along with the cinnamon, to the bowl with the fruit paste (photo 3). Use your fingers to knead the nuts into the paste (just keep squishing, it’s fun; brings back memories of play-dough; see photo 4).
.
Divide mixture in half. Place each half on each of one of the sheets of plastic wrap. Wrap the plastic around each bar and start squishing into a bar shape form, 3 and 1/2 inches long, 1 inch wide and 3/4-inch thick); press against countertop to flatten bottom side, flattening top side and ends with flat of hand (photo 5) Tightly wrap the plastic around each bar and store in the refrigerator. Makes 2 bars.
.
Nutrition per Serving (1 bar): Calories 207; Fat 9.4 g (sat .8g, mono 5.2g, poly 3.1g); Protein 3.9g; Cholesterol 0mg; Carbohydrate 24.9g; Sodium 0.4mg. (Note: I did the nutrition analysis using Diet Analysis Plus 7.0.1 )
A Few Ideas for Variations:
Apricot-Almond: Use 6 tablespoons coarsely chopped dried apricots and 2 tablespoons date (to measure 1/2 cup total); use almonds for the nuts.
Tropical: Use tropical fruit bits (these come pre -packaged at the supermarket); use raw cashews for the nuts. Add 1/8 teaspoon ground ginger, 1/2 teaspoon finely grated lime zest, and 1 teaspoon fresh lime juice to the mix.
PB & J (cheap and delicious!): Use 1/4 cup dried cherries or cranberries and 1/4 cup raisins or dates; use raw or roasted peanuts (lightly salted or unsalted) for the nuts.
Blueberry Bliss: Use 1/4 cup dried blueberries and 1/4 cup dates; use almonds for the nuts. Add 1/2 teaspoon finely grated lemon zest, and a drop of almond extract to the mix.
Cashew Cookie Dough: Reverse the proportions of fruit to nuts--Use 1/3 cup dates for the fruit and 1/2 cup raw cashews for the nuts.
Chocolate Chip Cookie Dough: Same as cashew cookie dough, but add 1/2 teaspoon vanilla extract, pinch of cinnamon and 1/2 ounce very finely chopped semisweet or bittersweet chocolate to the mix.
Peanut Butter Cookie Dough: Same as cashew cookie dough but use raw or roasted (lightly salted) peanuts for the nuts.
Dates Nutrition Notes:
Dates are included in a majority of the LARA Bars, so I thought I’d mention a few facts about these wonderful fruits.
I love dates because I love brown sugar, and dates taste like brown sugar candy--hence they are a delicious and healthy way to curb my sweet tooth. One date has a mere 23 calories and is loaded with nutrition. Dates are an excellent source of carbohydrates (great for pre- or post-workout), contain no cholesterol, are high in fiber, and boast a wide range of nutrients, including calcium (32 mg per serving), Magnesium, Phosphorous, Potassium, Iron, Zinc, Copper, and Manganese.
Dates also contain vitamins A1, B1, B2, B3, B5, C and more than 20 different amino acids; they help in the digestion and assimilation of carbohydrates, and help to regulate blood sugar levels and fatty acids content in our bodies.
PHOTO 1

PHOTO 2

PHOTO 3

PHOTO 4

PHOTO 5


Sunday, February 1, 2009
GF Better Batter
More info later, this is better batter and I'm just listing it now so I won't forget. Also, someone on the GF list said it has a lot of xanthan gum but maybe that's why it's "better".
4 c rice flour
1 c tapioca flour
1c potato starch
1/4 c potato flour
1/4 c xanthan gum
4 c rice flour
1 c tapioca flour
1c potato starch
1/4 c potato flour
1/4 c xanthan gum
Subscribe to:
Posts (Atom)